How to REALLY ReUse Plastic Shopping Bags
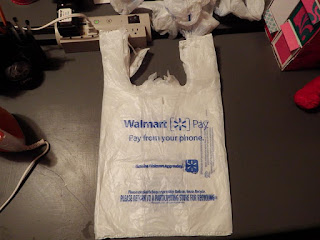
So, anyone who really reads this blog (what, all two of you?) will probably know that I made a previous post about reusing plastic shopping bags. In that post I used pictures from other sites, Google Images, etc. I DID give credit to the owner of the images, by the way. I also promised that eventually I would add my own images to the article. Well, rather than doing that I'm making a new post. The reasoning behind that is that I'm doing the bags in a slightly different way. Same way to make the sheets of stronger plastic, but I'm making them into larger totes by adding a bottom panel and side panels. So, stick around because that's what this article is about. (:
For most of this, I'm going to be adding numbers at the beginning of each separate instruction to make things easier to read.
3) Face the bag to you (in this image it's turned sideways) and lay a side panel across the side.
5) Now you'll be adding the bottom. Right now it doesn't need to be cut exactly to size. It was easier for me to melt one two sides before cutting it so I had a better idea of where to cut. You need to pinch the bottom sheet to the front or back panel and lay them down under a piece of paper to iron. It'll be a bit awkward, but it's definitely doable.
6) You have your tote! It's without handles right now, but you did it! This isn't really a step, but you deserve it for making it this far!
7) For the handles, you need to cut four strips from excess (which you should have) melted plastic. Make them all the same size, of course. No, we're not adding four handles. You'll see.
8) Adding those handles is the last step. Put the handle under the bag edge about an inch and a half, maybe two depending on the length of your handles overall. Iron the handle to the bag under a piece of paper. Make sure it's melted together quite well or your handles will fall off in the market!
For most of this, I'm going to be adding numbers at the beginning of each separate instruction to make things easier to read.
 |
| 1 |
1) First things first, you need to layer your bags. For this tote bag, I only layered two together. It's actually very sturdy and I don't think more are necessary depending on what you'll be putting into it. Make sure to iron them fully so that there are no separations and it's one solid sheet of plastic. You'll need to do this four times to make the other side, the side panels, and the bottom. Four times total, not four times more.
This is part of what you'll need. You need a piece for the front, a piece for the back, one piece can be cut in half for the sides, and a piece cut to fit the bottom of the new tote we're making.
 |
| 2 |
2) Cut the front and back pieces to the same size.
 |
| 3 |
Iron it carefully to melt the edges together. You don't want to melt through it, but you also definitely don't want it to come apart.
Do it again for the other side to get the image above. Now you've got your side panels attached to the front of your tote!
 |
| 4 |
4) Fold the side panels down (see above) and lay the back panel across one of the side panels, like the above image. You'll need to melt the edges together to melt the side panel to the back panel. Do it carefully so you don't melt through it, but long enough that they're fully melted together.
Fold the back panel over so that your tote looks like the above image. Melt the edges together under a piece of paper the same way you did when you melted the front panel to the other side panel. You'll have the above image when you're done, and then you'll be ready to add the bottom to your tote!
 |
| 5 |
5) Now you'll be adding the bottom. Right now it doesn't need to be cut exactly to size. It was easier for me to melt one two sides before cutting it so I had a better idea of where to cut. You need to pinch the bottom sheet to the front or back panel and lay them down under a piece of paper to iron. It'll be a bit awkward, but it's definitely doable.
You should be ironing like this. You'll need to do this for the two smaller side panels as well.
When you have the front (or back) and sides melted to the bottom sheet, you'll be able to easily cut your bottom sheet to the size needed to finish melting it together. Cut along the open edge so that the bottom sheet matches even with the panel you're melting. Then lay flat under paper like you did with the other three edges and melt it together. If you have any openings, just lay them under paper and iron them together.
 |
| 6 |
6) You have your tote! It's without handles right now, but you did it! This isn't really a step, but you deserve it for making it this far!
 |
| 7 |
7) For the handles, you need to cut four strips from excess (which you should have) melted plastic. Make them all the same size, of course. No, we're not adding four handles. You'll see.
Lay them two together and melt together only about an inch of the edge. Not both edges, just one. You're making a longer handle is all you're doing right now.
This is what they'll look like when you're done.
Lay them flat, put paper on top, and iron the flappy bits together. That way you won't have those little tags sticking out on your handles!
 |
| 8 |
Fold the handle before ironing the other side. You can see in the image what I mean. It makes the handle easier to hold overall because it doesn't twist and it lays flatter for your hand. Iron the edge the same way you did for the first edge. Do this on the other side the exact same way. Make sure your handles are completely even. I didn't and had to melt and correct it a bit.
TADA!!! You've got a reusable tote! Even with just two layers instead of the recommended four, it's still a very sturdy little bag.
In this picture I added 6 guavas, three avocados, two apples, a kiwi, 6 large pears, and two plums. I carried it around my kitchen and it held up quite nicely with no straining. I actually carried it long enough until I couldn't carry it anymore. So! I hope this tutorial was easy to follow. It's a bit harder than the original one I posted, but the bag ends up being much roomier, and that's necessary for a bag that doesn't have the stretch a regular plastic bag would have.
ENVIRONMENTAL VENI


Comments
Post a Comment